


No tags yet.
It's a 3-day weekend and I was super excited to get going on my crafting. But Saturday was spent almost the entire day at a work event and in traffic so that left Sunday to get going. After a great day with my husband and kids, I sat down at my craft space and started testing some of the things I hadn't been doing with my Silhouette Portrait.
These were the 3 things I wanted to get familiar with again this weekend -
1 Sketch Pens
Silhouette machines allow you to not only cut or score (perforate) lines on a picture file, but it also allows you to write using the Silhouette Sketch Pens or any other pen that can fit into the Silhouette Pen Holder Adapters.


I have the Silhouette Sketch Pens and a local brand (L'il Hands Colouring Pens), which both work equally well. What I like about the machine's sketching ability is that I don't need to have access to a printer to make cards or other paper products. Just switch the blade with a pen and you're good to go! Be sure, though, to change the blade to the 'Sketch' setting. The photo shows the menu on Silhouette Design Studio Standard Edition v.4.
2 PixScan
When PixScan first came out 2 years ago, I was so excited to try it. But when the mat arrived, it took me some time to test it because I was put off by the idea of calibration and uploading the photo and all the other things you need to do to get it right. So I really only used PixScan last year for a Christmas greeting card project, and it was a great experience!
What you need to know about PixScan is that the set-up may take some time because you need to calibrate your camera (I used my iPhone 6S+) to the Silhouette Design Studio (SDS) software and it may take a few tries to get it working. You also need to make sure your printer resolution is high enough to show the registration marks and dots, and that you take the photo in a well-lighted space. Once calibrated, just paste the image you want to cut onto the PixScan mat, snap a photo, upload to SDS and start tracing away. You need to do trace so that you can put in the cut lines.


3 Print & Cut
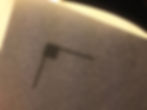
Aaaah, we now come to the controversial Print & Cut feature of Silhouette. I was working on this for HOURS!!! For some reason, I couldn't get my machine to recognize the Registration. I will give a more detailed write-up on how to calibrate your machine (only if needed!) and how to do the Print & Cut function flawlessly but for now, I'll just focus on what went wrong. Apparently, my printer's default was set to a 8.5 x 13" page setup while my machine's default was at 8.5 x 11". So while the Send to Printer was working fine, once the printed sheet with registration marks went through the machine, the optical scanner just wouldn't read it right. And I discovered that the easiest way to know if Print & Cut is set up properly is if you do this simple test: In SDS, go to Registration Marks in the Page Setup of the Design View. Send to your printer and fold lengthwise down the middle (so that both ends of the paper meet perfectly). Hold the sheet against the light; if the black sqaure on the left side does not fit into the right angle corner of the folded right side, this means that the printer is not set up to match SDS. There's about a 12mm difference in my photo below:

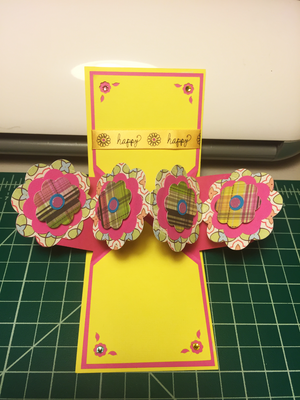
So I went back to my printer setup and made sure that my default paper was set to 8.5 x 11" (or US Letter). And it worked! When I printed the Registration marks page again and folded the paper over, the black square fit almost perfectly into the right angle corner. And when I did a Print & Cut with the image below, it cut pretty well and close to the edges of the image.

So that wraps up this edition of Silhouette Sanity Savers! Do you have any Silhouette Design Studio questions for me? Send me a message! ♥